Configuration on the Server “Windows Server 2012”
1) Go to Control Panel\All Control Panel Items\Administrative Tools\Computer Management\Local Users and Groups\Users.
– Create a new User.
– Add the created User to the following Groups;
a) Administrators
b) Hyper-V Administrators
c) Remote Management Users
d) WinRMRemoteWMIUsers
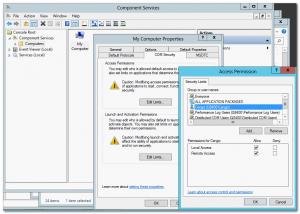
2) Go to Control Panel\All Control Panel Items\Administrative Tools\Component Services.
Click Computers > right click My Computer > Properties > select “COM SECURITY” tab under “ACCESS PERMISSIONS” > select “Edit Limits” > select “ANONYMOUS LOGON”, and be sure that “REMOTE ACCESS” is allowed. Add the new created USER to the group and allow “Local and Remote Access”.
3) Open a cmd.exe as Administrator and type the following commands to configure the firewall.
[blockquote]- netsh advfirewall set currentprofile settings remotemanagement enable
– netsh advfirewall firewall set rule group=”Windows Firewall Remote Management” new enable=yes[/blockquote]
Configuration on the Client “Windows 8”
1) First we have to install the Hyper-V Manager Feature over the “Programs and Features” option in Control Panel.
2) After that follow the steps mentioned below.
3) Go to Control Panel\All Control Panel Items\Administrative Tools\Computer Management\Local Users and Groups\Users.
– Create the same User name on the Windows 8 PC which we have created on the Windows Server 2012.
– Add the created User to the following Groups;
a) Administrators
4) Go to Control Panel\All Control Panel Items\Administrative Tools\Component Services.
Click Computers > Right-click My Computer > Properties > select “COM SECURITY” tab under “ACCESS PERMISSIONS” > select “Edit Limits” > select “ANONYMOUS LOGON” and check the option “REMOTE ACCESS” under ALLOW . Add the new User to the group and allow “Local and Remote Access”.
5) Run cmd.exe as Administrator and type;
[blockquote]cmdkey /add:Your_Servername /user:User_Name_On_The_Server /pass:The_Password_Of_That_User[/blockquote]
6) Now try to connect to the Hyper-V 3.0 Server via Hyper-V Manager on the Windows 8 client.
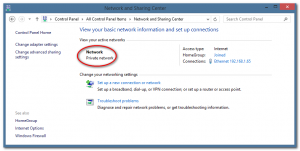
Note: Be sure that the Network Status on your Windows 8 PC and Windows Server 2012 are set to “Private”.
Good luck !


